user guide
This guide walks through the process of booking, rescheduling, and cancelling appointments using CDL Scheduler.
booking an appointment
step 1: select a meeting type
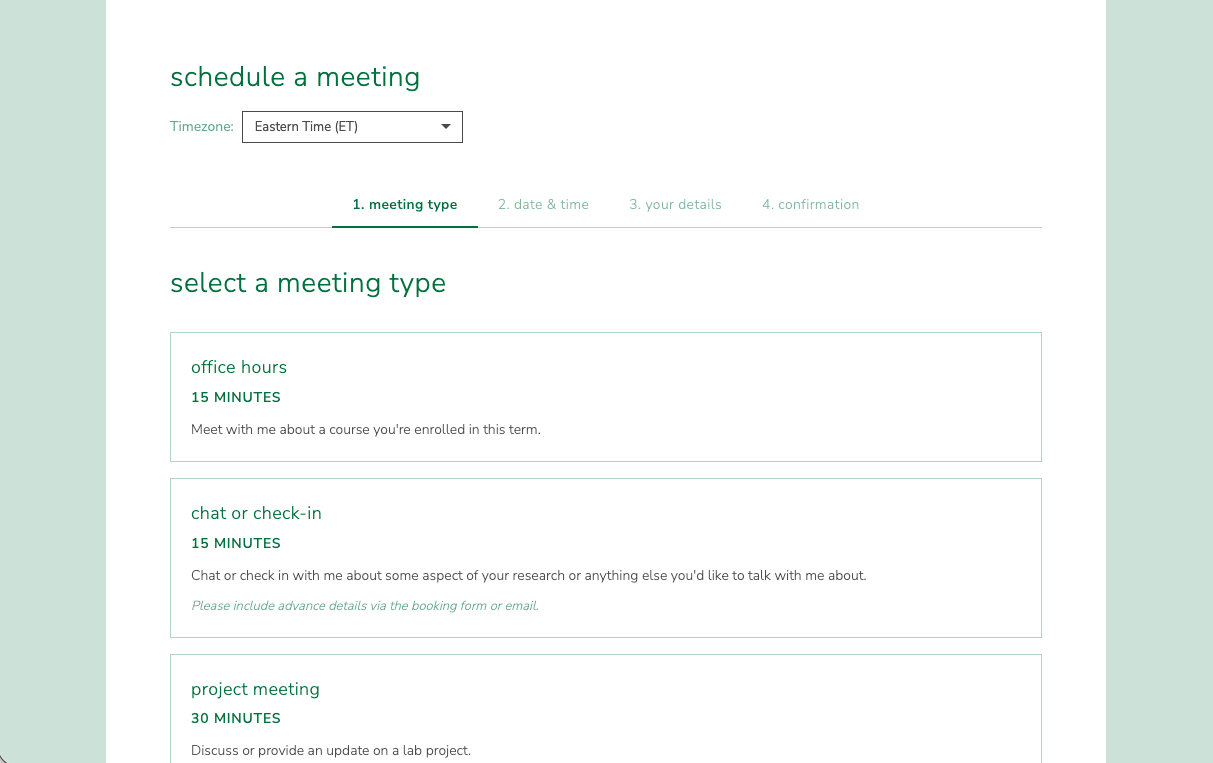
When you visit the scheduler, you will see a list of available meeting types. Each type shows a name and description.
The available meeting types are:
Office hours — for students enrolled in a course this term
Chat or check-in — for research discussions or general conversation
Project meeting — for lab project updates and discussions
Other — for non-standard meetings
Click on a meeting type to proceed.
step 2: choose a duration
After selecting a meeting type, you will see four duration options:
15 min
30 min
45 min
1 hr
All durations are available for every meeting type. Click on a duration to proceed.
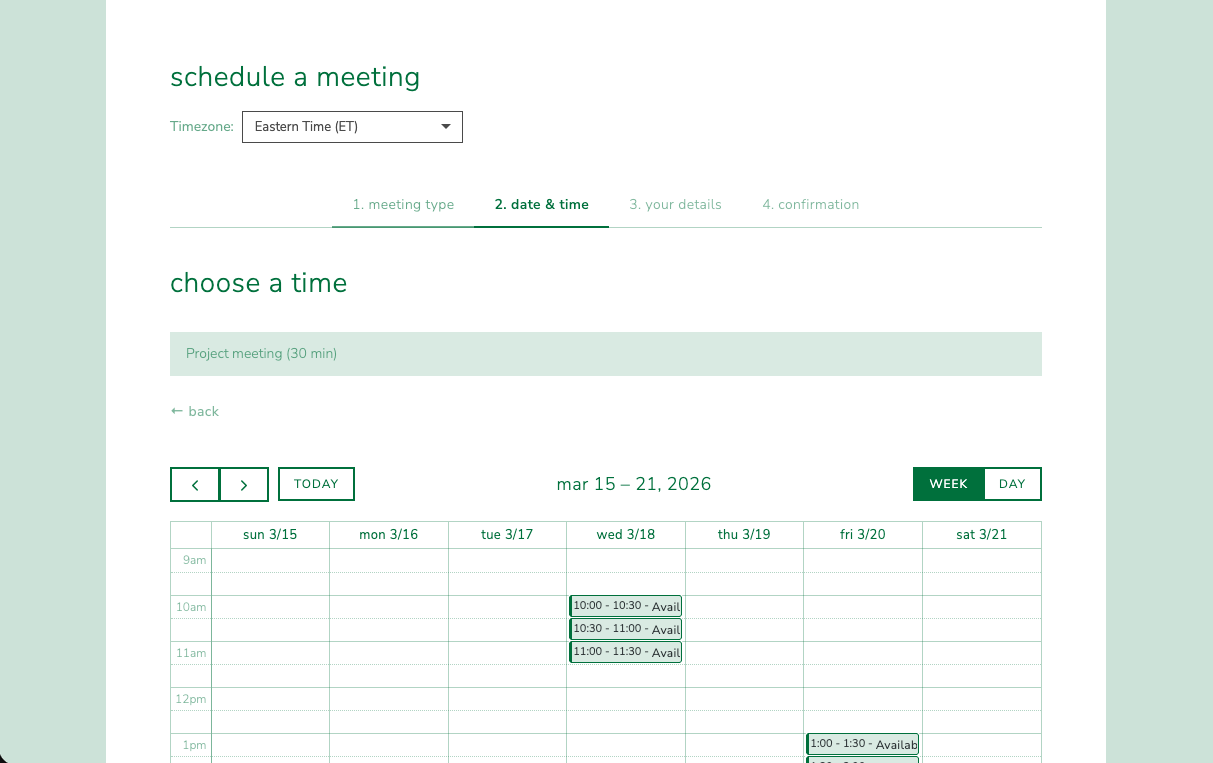
step 3: choose a date and time
After selecting a duration, a calendar view appears showing available time slots. Available slots are highlighted in green and sized to match your chosen duration.
Use the arrow buttons to navigate between weeks
Click on an available slot to select it
The calendar displays times in your local timezone (adjustable via the timezone selector at the top)
step 4: fill out the booking form
After clicking a slot, the booking form appears. Fill in:
First name and Last name — your name as it should appear on the calendar event
Email — where you will receive the confirmation (and reschedule/cancel links)
Format — choose between virtual (e.g., Zoom) or in-person
Purpose — briefly describe why you are booking
Notes — (optional) any additional details
Note
If you selected Chat or check-in or Project meeting, an instruction banner will appear at the top of this step asking you to share a Google Doc with your agenda and supporting materials before the meeting.
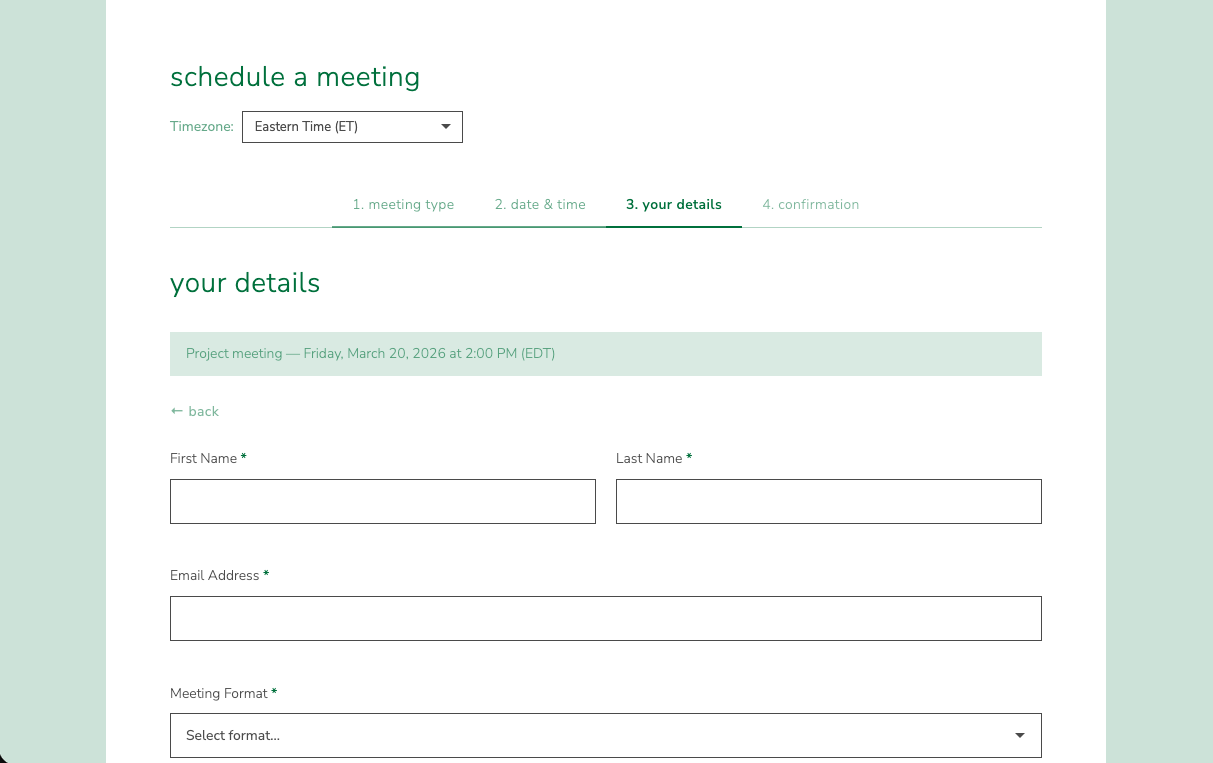
Click Submit to complete your booking.
step 5: confirmation
After submitting, you will see a confirmation page with:
The meeting type and duration
The meeting date, time, and location (virtual link or physical address)
Links to reschedule or cancel your booking

Tip
Save the reschedule and cancel links from the confirmation page or your confirmation email — you will need them to manage your booking later.
rescheduling a booking
If you need to change the time of your booking:
Click the reschedule link from your confirmation email or the confirmation page
A calendar view appears showing available time slots (similar to the original booking flow)
Click on a new available slot
Confirm the reschedule
After rescheduling:
The original calendar event is removed
A new calendar event is created at the selected time
Both you and the calendar owner receive an updated confirmation email
New reschedule and cancel links are generated (the old links will no longer work)
Note
Each time you reschedule, new management links are generated for security. The links from your original booking will stop working.
cancelling a booking
If you need to cancel your booking:
Click the cancel link from your confirmation email or the confirmation page
A cancellation confirmation page appears showing your booking details
Click Confirm Cancellation
After cancelling:
The calendar event is removed
Both you and the calendar owner receive a cancellation notification email
The booking is marked as cancelled and cannot be rescheduled
email notifications
CDL Scheduler sends automatic email notifications at each stage:
confirmation email
Sent to both the visitor and the calendar owner
Contains the meeting type, duration, date, time, location, and purpose
Includes an iCal attachment (.ics file) that can be added to your calendar app
Contains links to reschedule or cancel the booking
reschedule notification
Sent to both parties when a booking is rescheduled
Contains the new meeting date and time
Includes an updated iCal attachment
Contains new reschedule and cancel links
cancellation notification
Sent to both parties when a booking is cancelled
Confirms the cancellation with the original meeting details